Engineering Level Management
The Engineering Level Management functionality in ShopEdge allows users to manage Engineering Levels against an Item. ShopEdge will separate Inventory by Engineering Level, and allow users to control Shipping, Production, and Inventory as an Item undergoes an Engineering change.
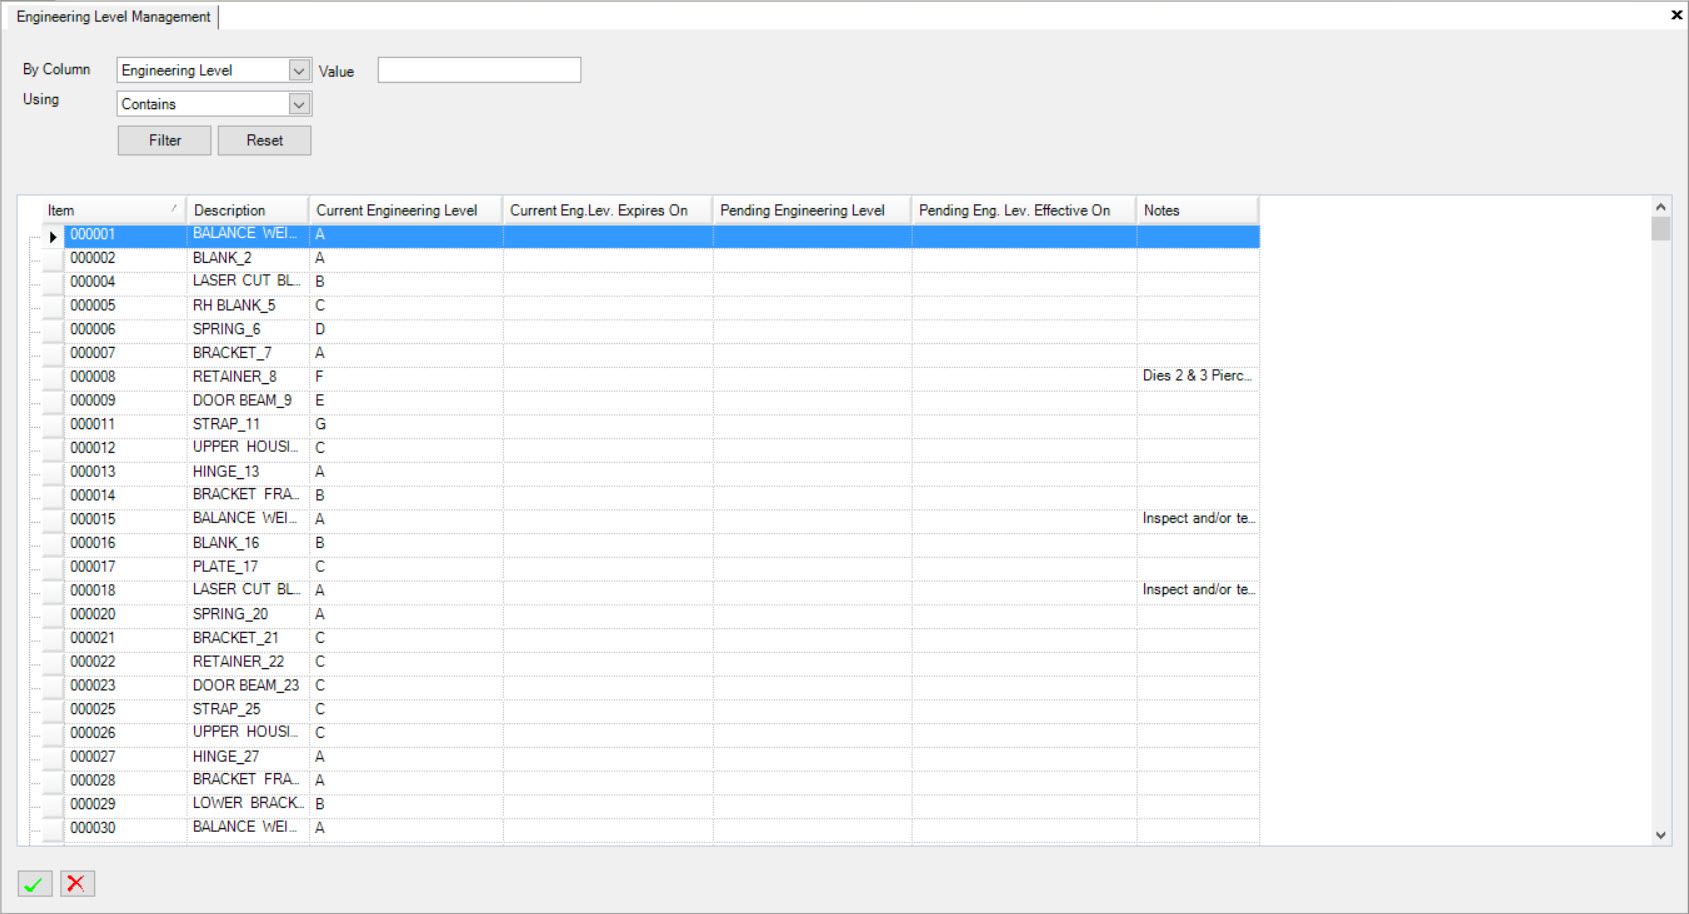
Engineering Levels can be managed on the Engineering Level Management screen.
To view the Engineering Level Management screen, navigate to the  tab and click on the
![]() icon. The Engineering Level Management screen will be displayed.
icon. The Engineering Level Management screen will be displayed.
Adding a New Engineering Level to an Item
To add a new Engineering Level to an Item, navigate to the  tab and click on the
![]() icon. The Engineering Level Management screen will be displayed.
icon. The Engineering Level Management screen will be displayed.

Locate the Item you wish to add an Engineering Level to and highlight the appropriate row. Then, click on the  button located at the bottom
of the screen.
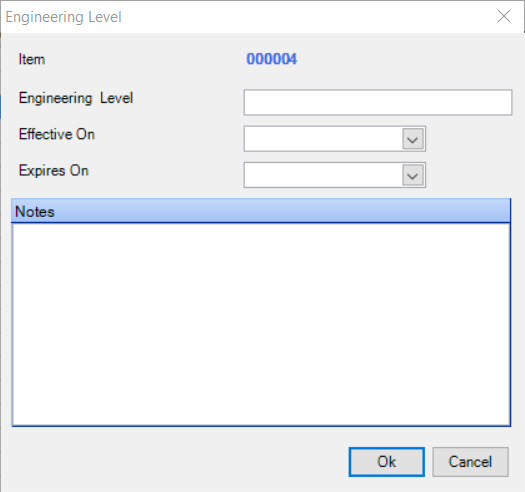
The Engineering Level window will appear. Users can fill in the Engineering Level, Effective On date, and Expires On date as well as add any necessary Notes. Click on the
 button.
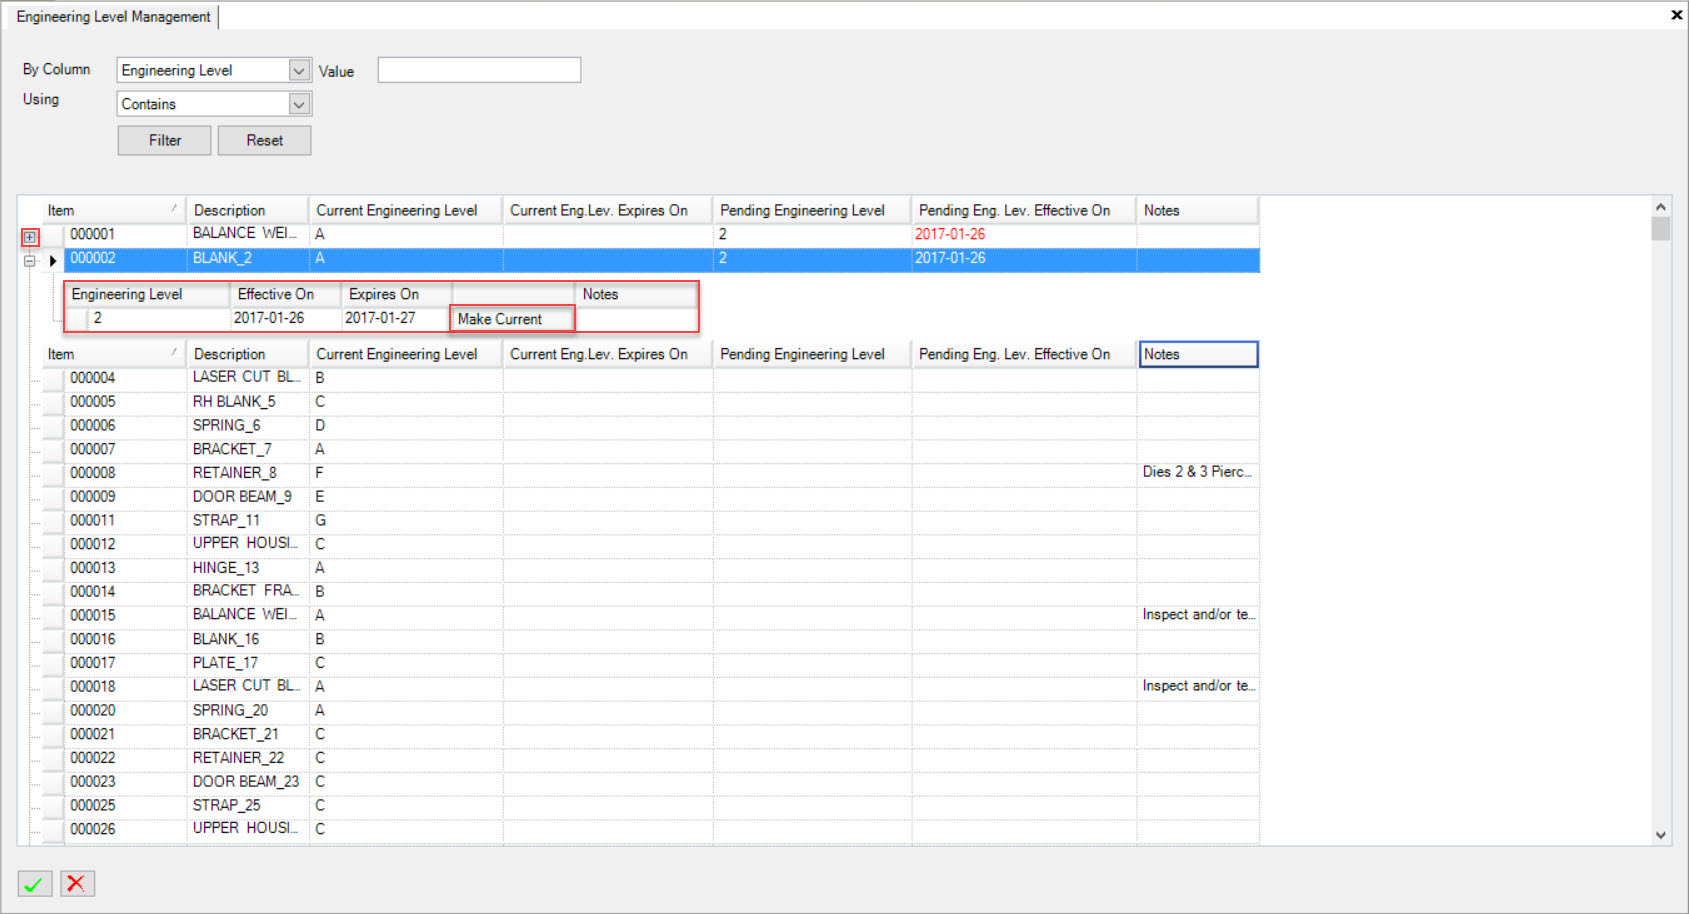
A plus sign will appear located beside the Item that was highlighted and the Item will then be switched to Pending.
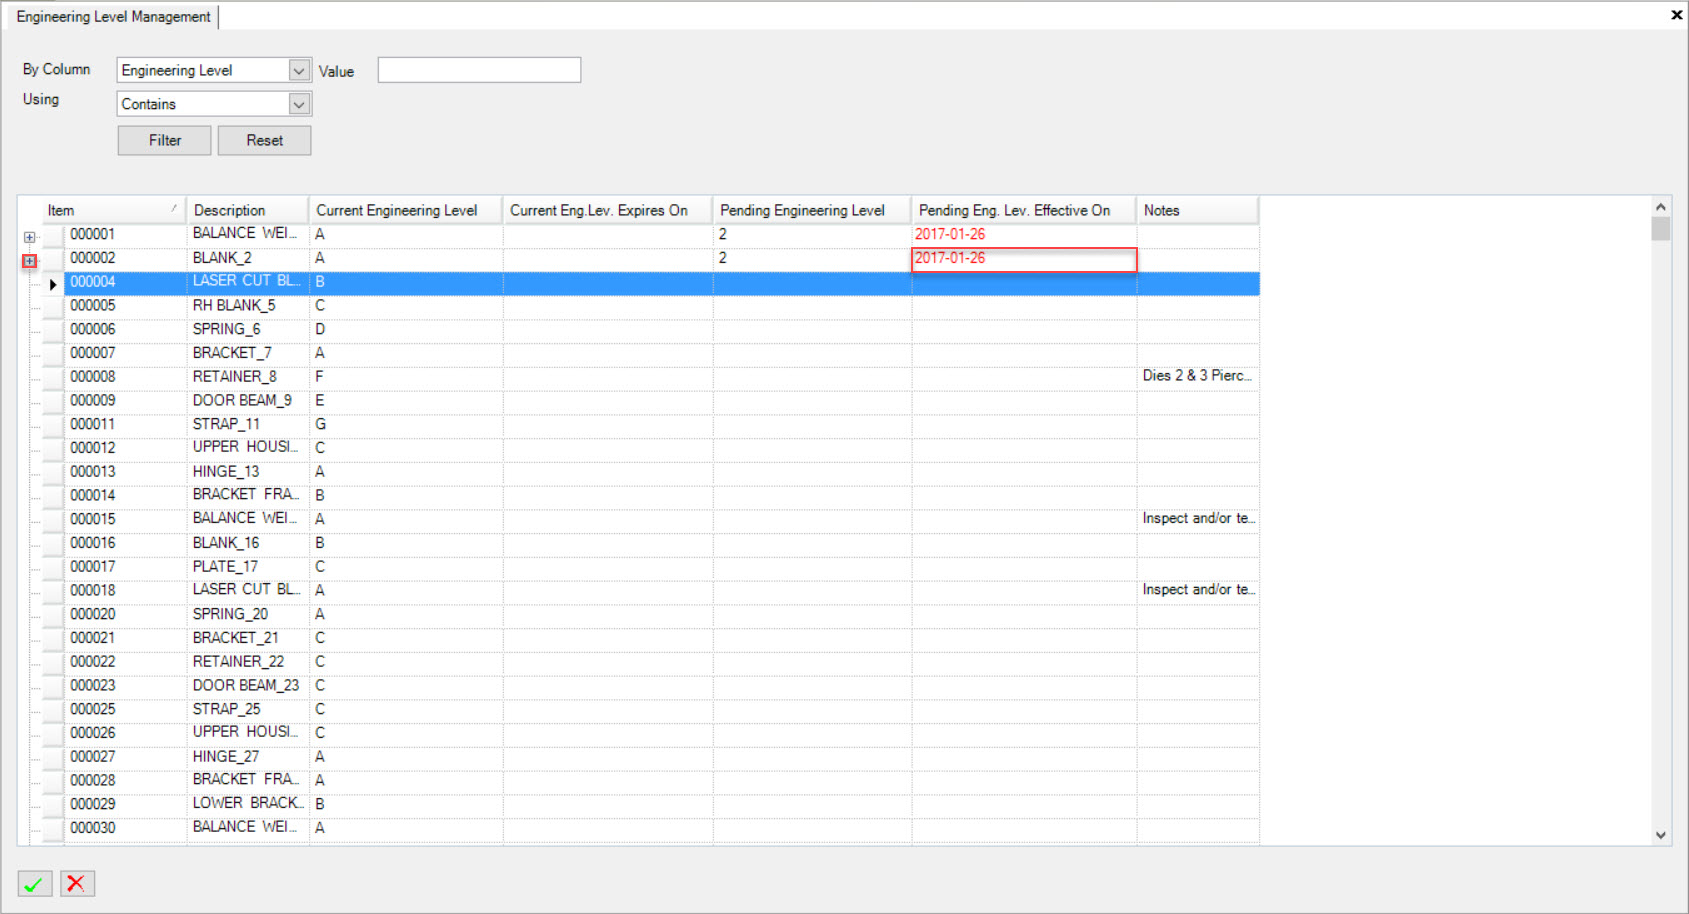
To expand the Item, click on the plus sign. Users will be able to view the Engineering Level that was just added. They also have the ability to make the Engineering Level Current instead of
Pending. To do so, click on the  button.
Editing an Engineering Level
To edit an Engineering Level, navigate to the  tab and click on the
![]() icon. The Engineering Level Management screen will be displayed.
icon. The Engineering Level Management screen will be displayed.

Locate the Item and click on the plus sign to expand it. Double-click on the Engineering Level you wish to edit for the expanded Item.
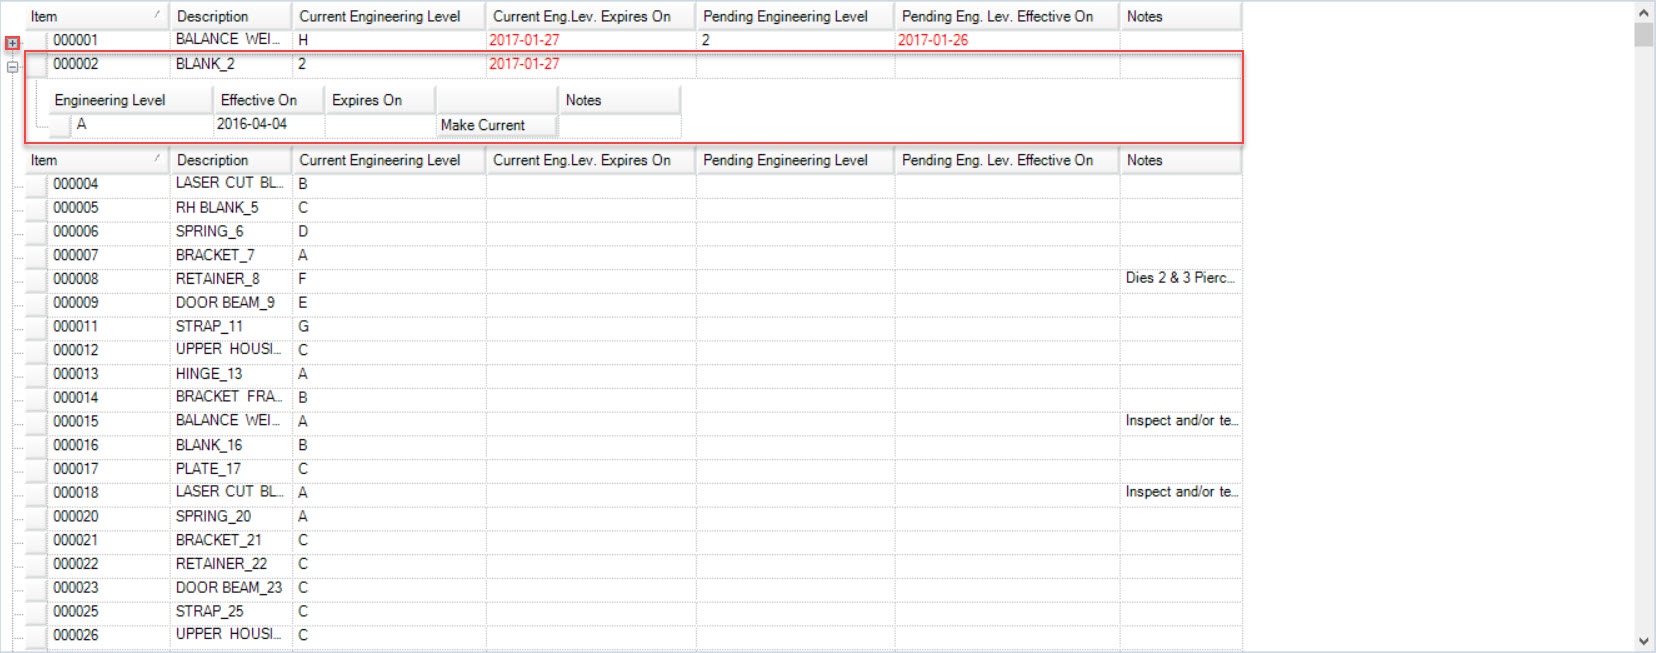
The Engineering Level window will appear. Users have the ability to edit the Engineering Level, Effective On, and Expires On dates as well as add, edit, or remove any Notes attached to the Engineering Level.
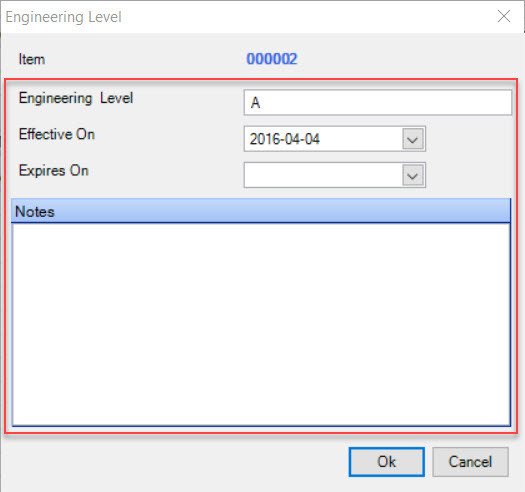
Click on the  button to complete your changes.
You will notice that the selected Engineering Level will be updated on the Engineering Level Management screen.
Deleting an Engineering Level
To delete an Engineering Level, navigate to the  tab and click on the
![]() icon. The Engineering Level Management screen will be displayed.
icon. The Engineering Level Management screen will be displayed.

Locate the Item and click on the plus sign to expand it. Highlight the Engineering Level you wish to delete from the expanded Item.
Click on the  button. When the system prompts you, select OK.
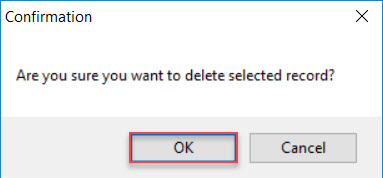
The selected Engineering Level will be deleted.
Make sure to save your changes before exiting the screen.
Viewing an Engineering Level on the Manufacture Routing Screen
Users can also view Engineering Levels in the system when navigating to the Manufacture Routing screen. To do so, navigate to the  tab
and click on the
 ![]() icon. The Manufacture Routing Lookup screen will be displayed.
icon. The Manufacture Routing Lookup screen will be displayed.
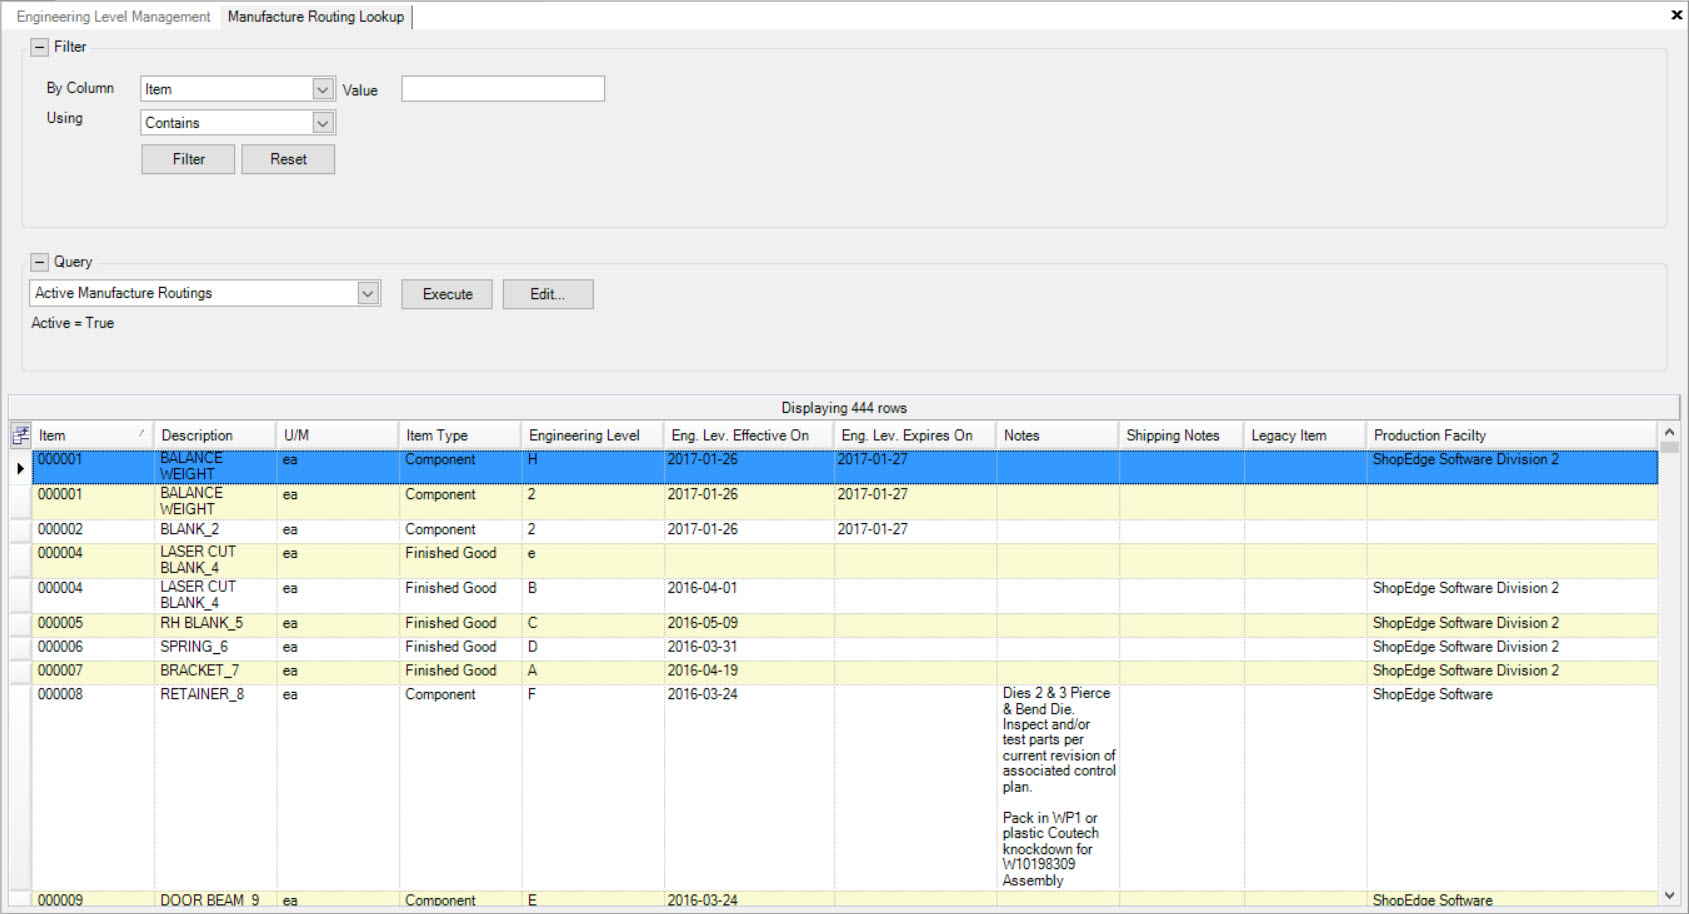
Locate and double-click on the Item that you wish to view the Manufacture Routing for. The Manufacture Routing detailed screen for that Item will be displayed.
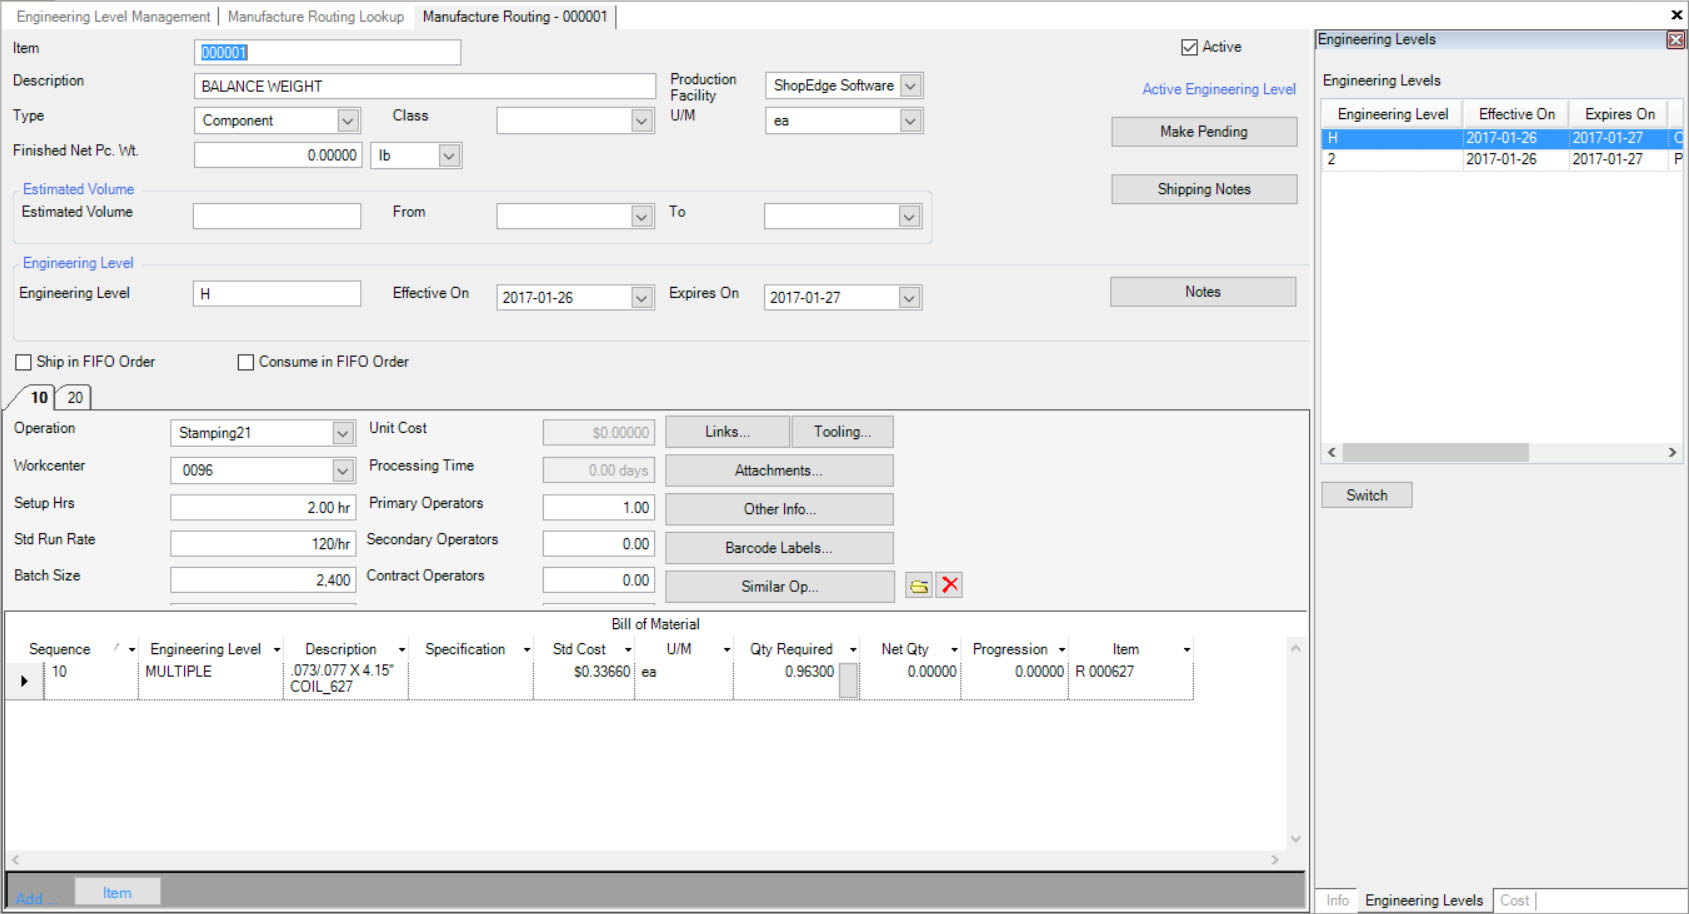
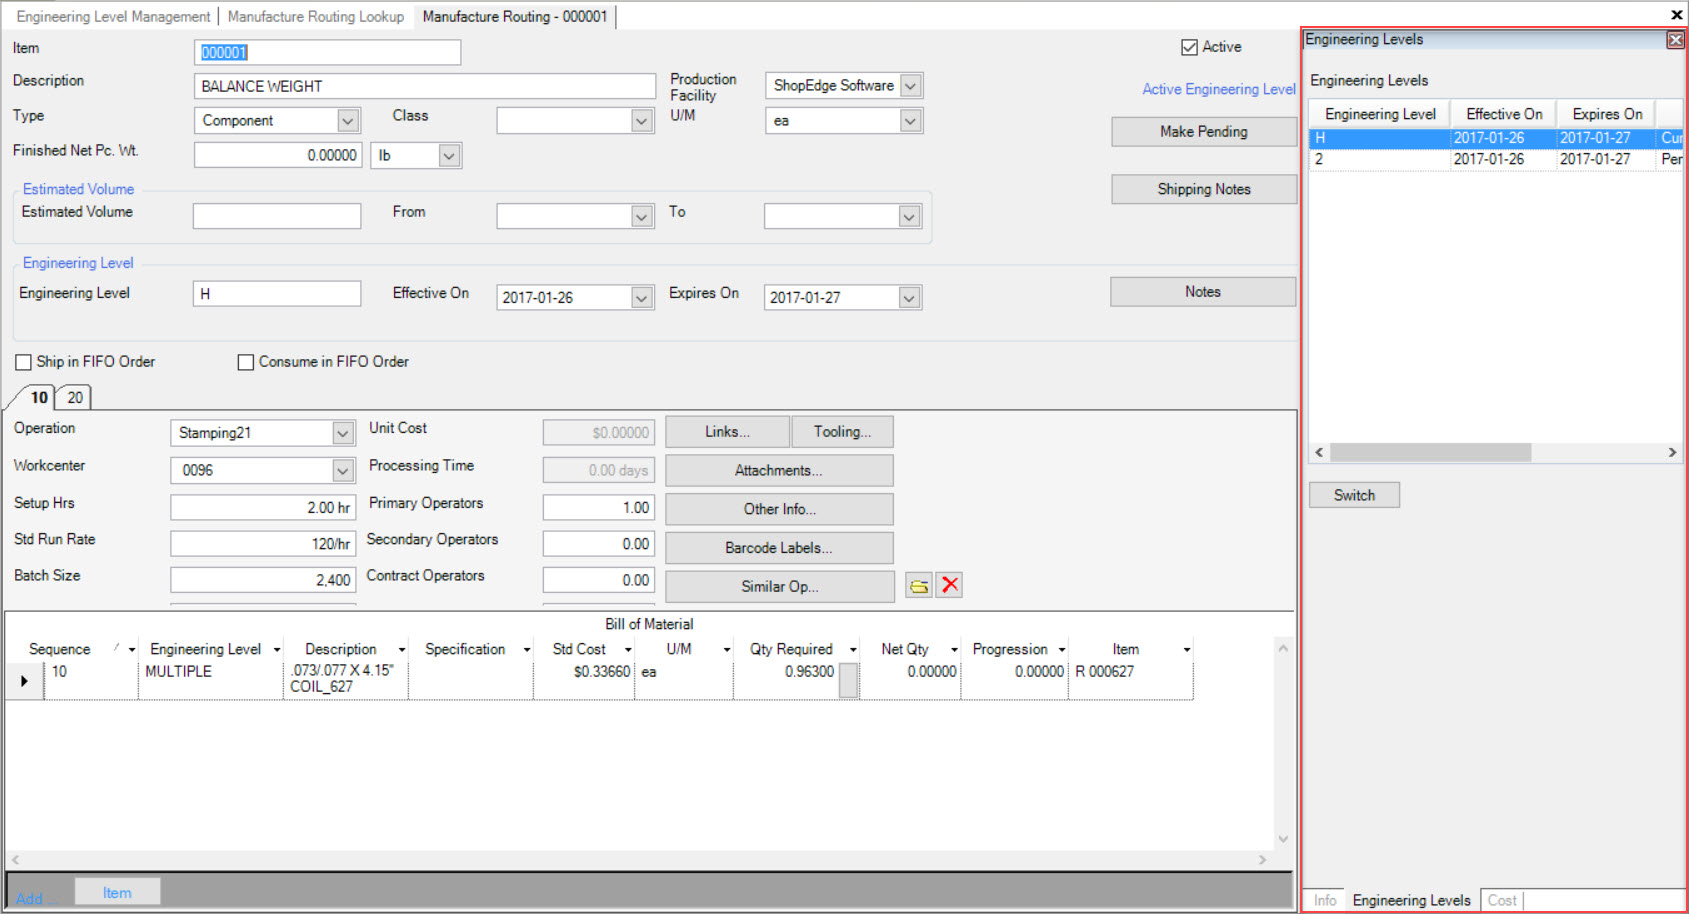
Located to the right of the screen, the Engineering Level(s) will be listed.
Switching between Engineering Levels
When an Item in the Manufacture Routing screen contains more than one Engineering Level, users are able to switch between levels if necessary.
To do so, navigate to the  tab and click on the
 ![]() icon.
The Manufacture Routing Lookup screen will be displayed.
icon.
The Manufacture Routing Lookup screen will be displayed.

Locate and double-click on the Item that you wish to view the Manufacture Routing for. The Manufacture Routing detailed screen for that Item will be displayed.

Located to the right of the screen, the Engineering Level(s) will be listed.

Highlight the current Engineering Level as well as the row of the Engineering Level you wish to switch to and click on the  button.
Note
Looking at the Status of the Engineering Level will help to determine if the level is Current or Pending.
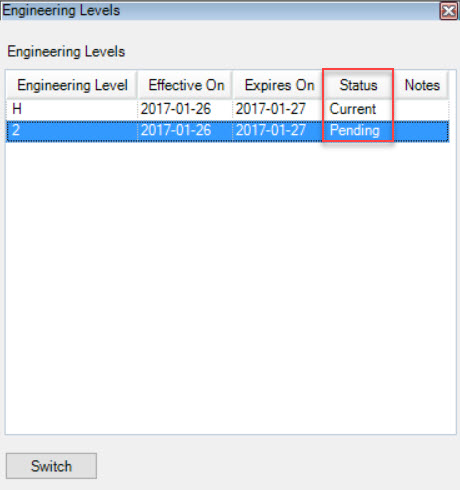
The highlighted Engineering Levels will be switched. The Engineering Level that was Current will not be switched to Pending and the Engineering Level that was Pending will now be switched to Current.
Controlling Shipping and Scheduling for an Engineering Level
The system allows users to control Shipping and Scheduling for an Engineering Level on the Manufacture Routing screen.
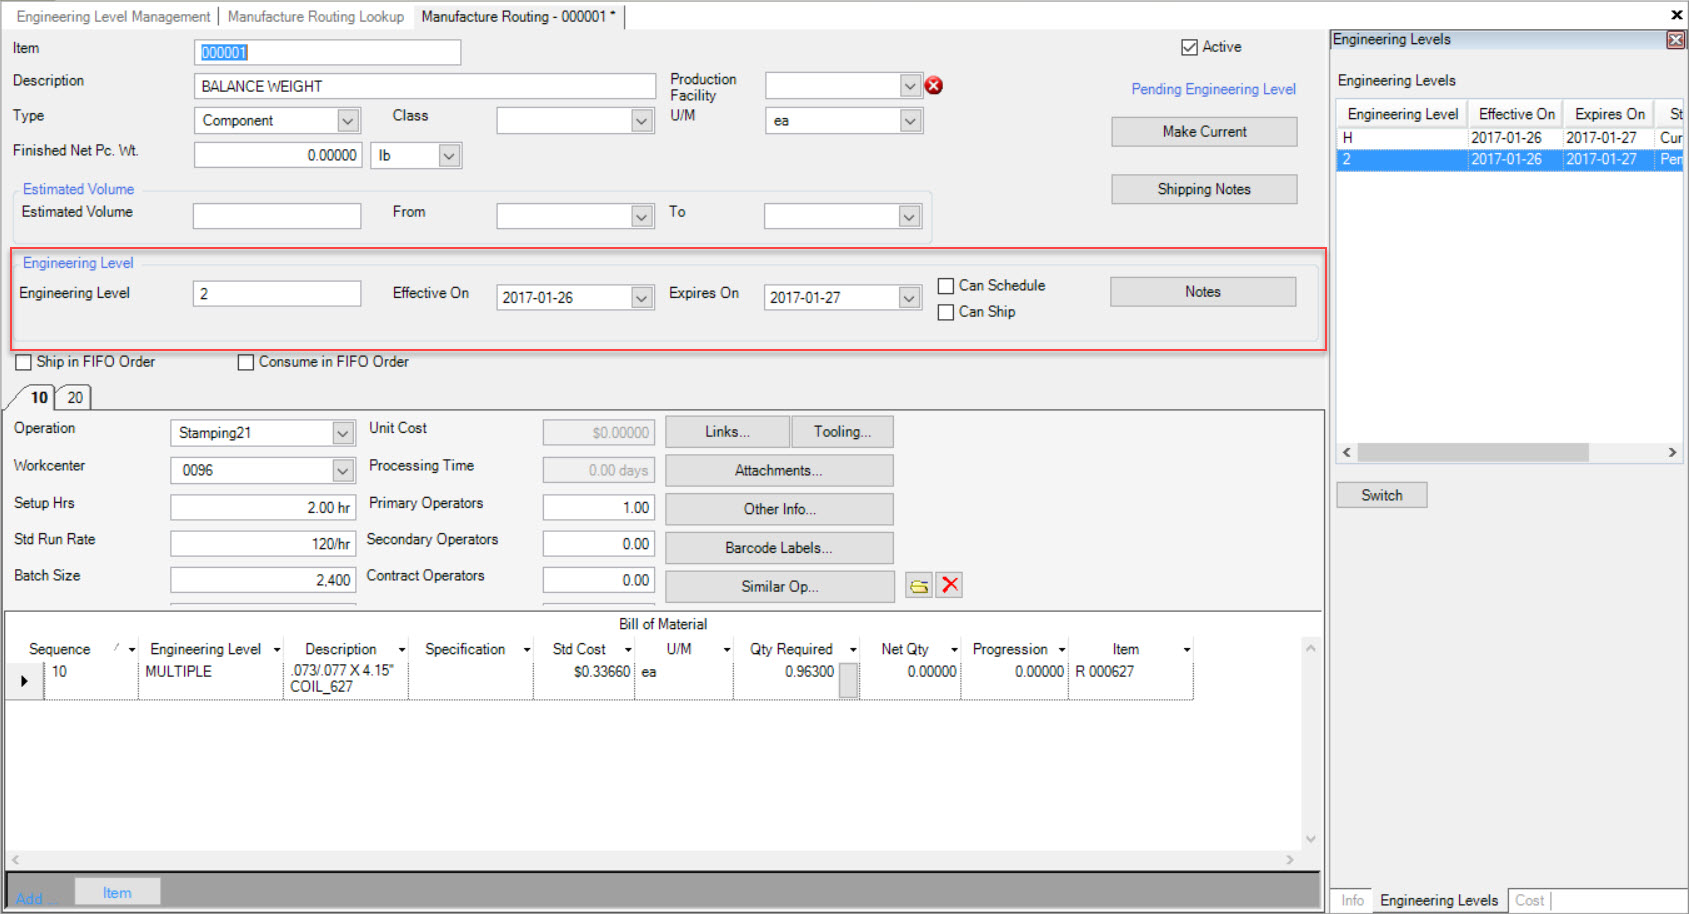
If the  and
and  boxes are not selected, the Item will not be added to the Production Schedule or
allowed to be shipped.
Select the appropriate box(es), and make sure to save your changes before exiting the screen.
Note
Users also have the ability to enter in any Notes that are necessary in regards to controlling the Shipping and Scheduling of the Engineering Level of a particular Item.
Email Notifications for Engineering Levels
If users wish to receive Email notifications in regards to Engineering Level alerts, they have the ability to do so.
Navigate to the  tab and click on the
 ![]() icon. The Event Subscriptions screen will be
displayed.
icon. The Event Subscriptions screen will be
displayed.
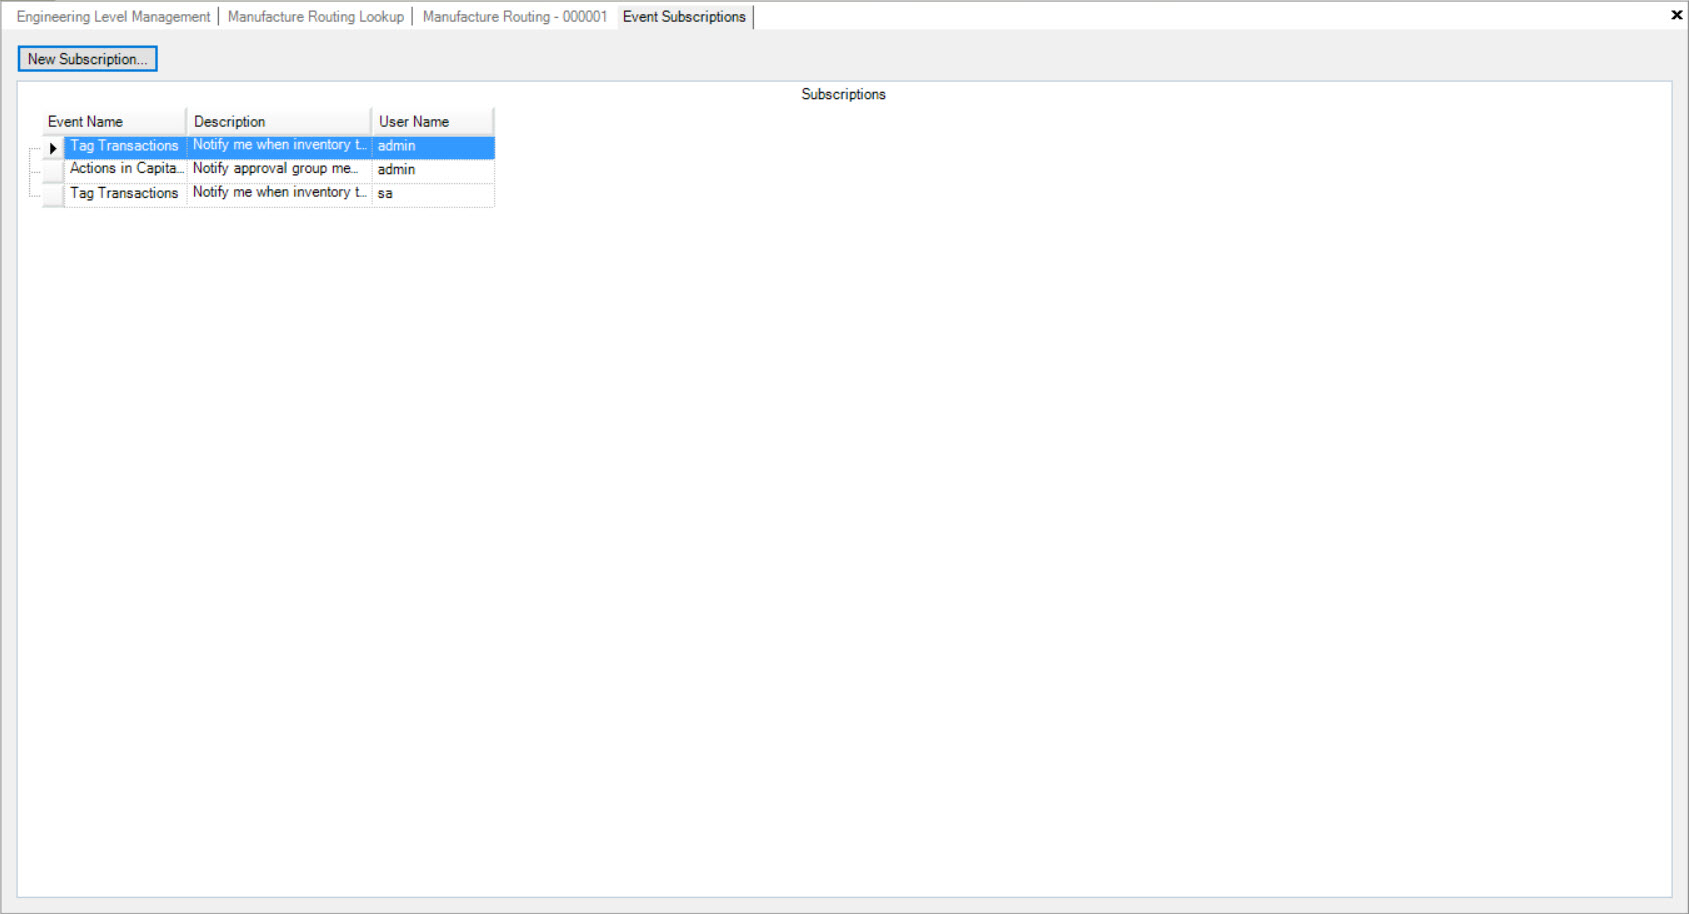
Click on the  button. This will open the Event Subscription window.
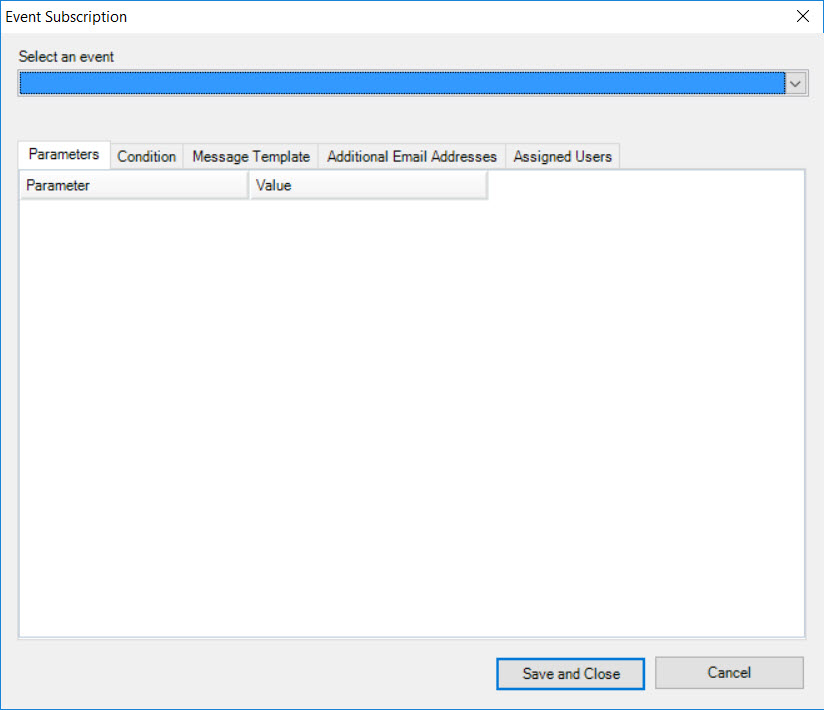
Select Engineering Level Alerts from the Select an event drop-down menu. Using the Tabs, enter in the necessary information such as the Parameters, Condition, Message Template, Additional Email Addresses, and Assigned Users.
Once all the necessary information is completed, click on the  button.
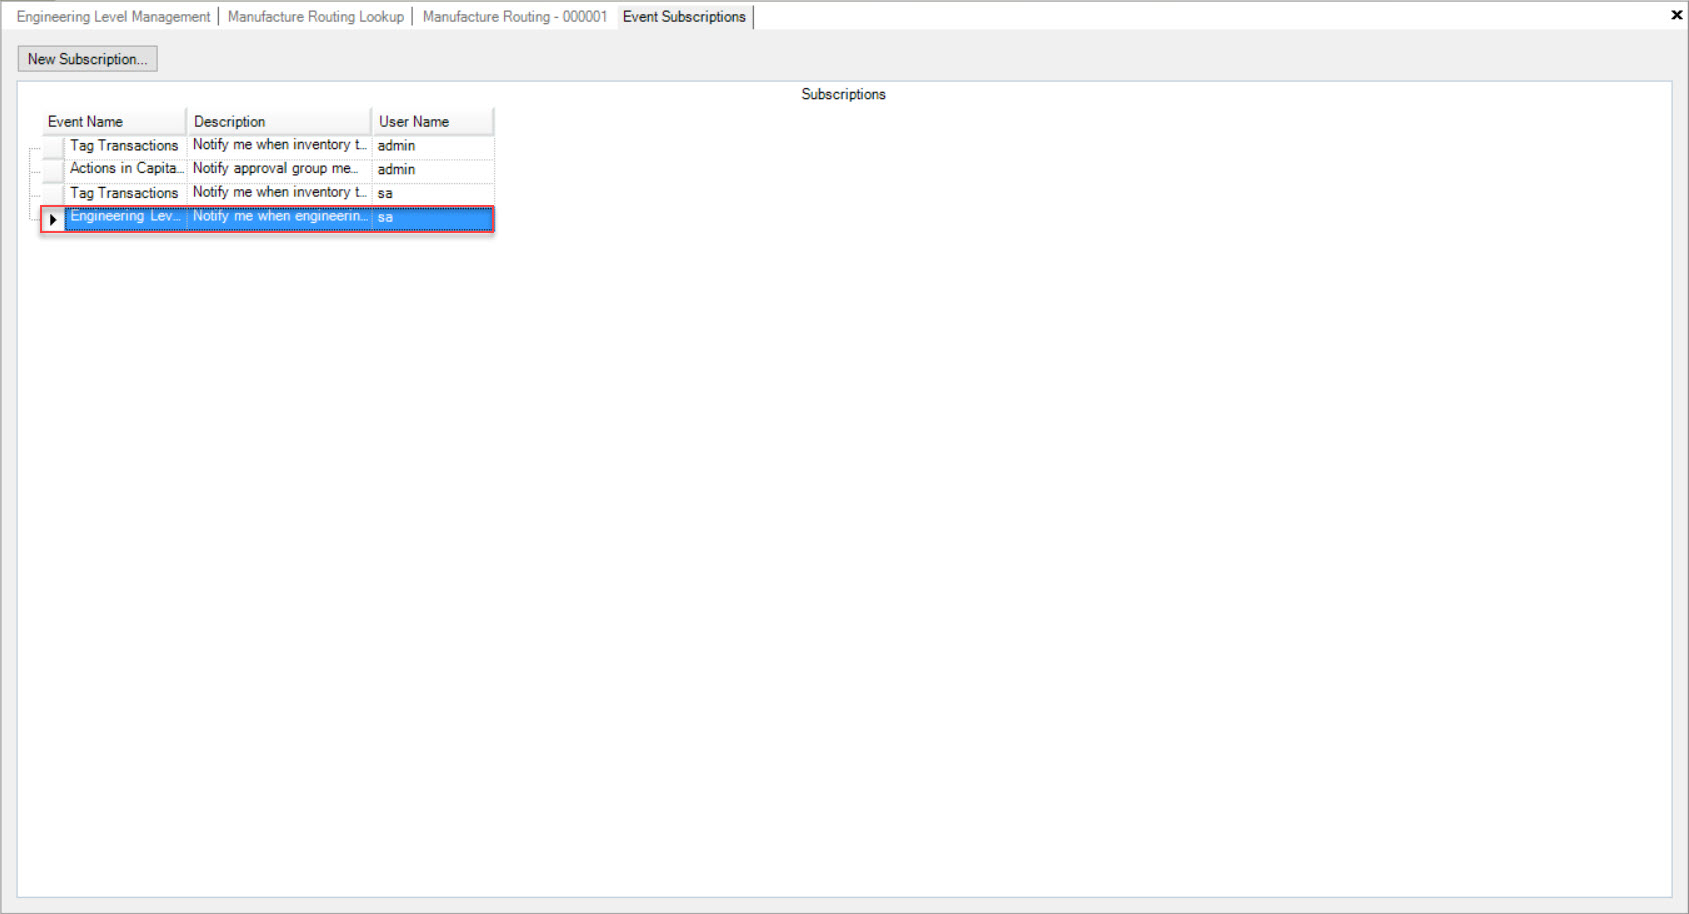
The subscription selected for Engineering Level Alerts will now appear on the Event Subscriptions screen and the user(s) will receive Email notifications.
